Infinity ITS17 - Corporate Appropriation - Shock Army of Acontecimento vs Jurisdictional Command of Tunguska

I’ve been working on getting my Shock Army finished up for the last few months and stretching my painting and hobby skills to try and do them justice. Now that they’re 99% done, barring a few exceptions, they’ll be the primary occupant of my Infinity bag for the next 6ish months. I’ve already played a couple games with them so far, and the list here is a revision of one I played into Onyx Contact Force a few weeks ago. In that game of Area of Interest, the Dragao was excellent, right up until I made the stupid choice to not bring it back into my lines at the end of my first turn. Then Nourkias stood up and shredded the TAG with his K1 Combi, and I was left without any long range guns in the list. So this version cut some things to make room for the Guarda De Assalto HRL to give me another option for ranged firepower.

One of our local WarCors, Trevor/Twiggy, was looking for a game on our Thursday game night and I happily volunteered. I know Trevor is an avid SAA Enjoyer, and our game in my first tournament during N4 was also my first experience with SAA. After our game, he said that he hadn’t actually played against Shock Army since maybe 2018, and loved seeing it on the other side of the table at long last.
He had originally said that he was hoping to get a game in with his Szalamandra to give it one last outing before stripping it to repaint, so I chose the updated Dragao list. Sadly, we ended up playing Corporate Appropriation, and Trevor chose a llist that did not, in fact, include Szally. And I was stubborn enough to stick to playing the Dragao list, even if perhaps it wasn’t the best list for the table/mission.
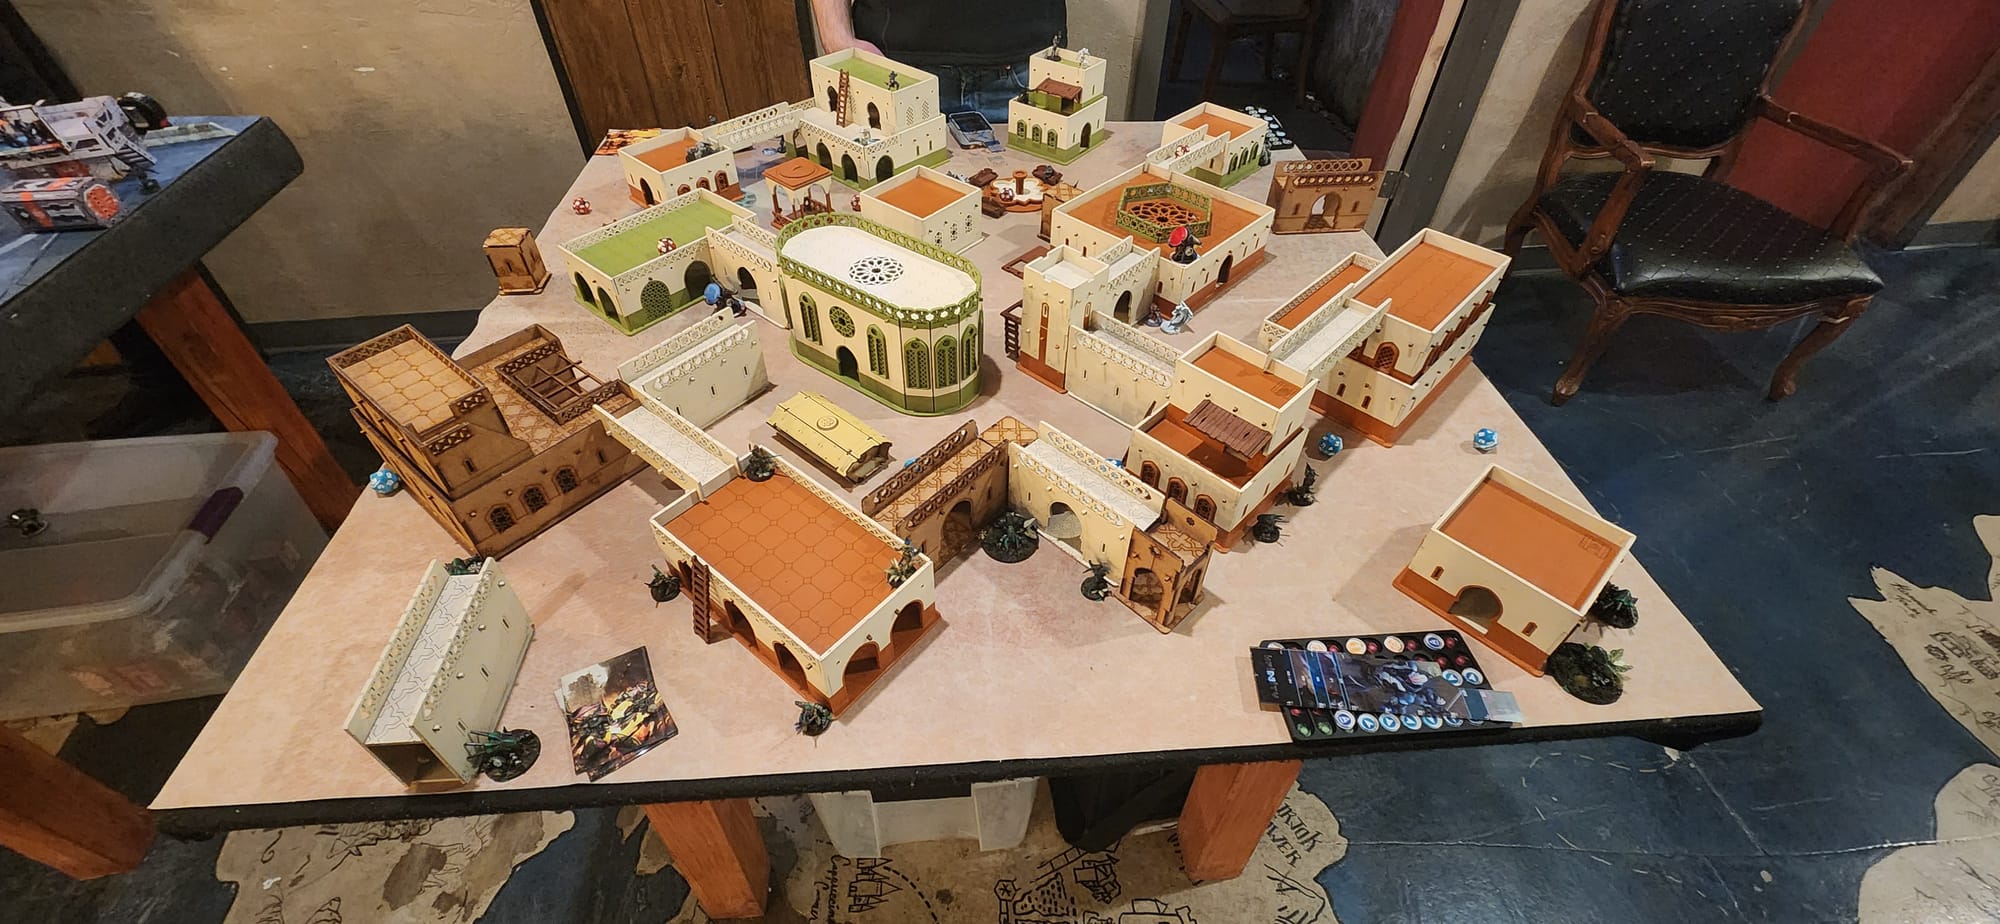
We went through the Lieutenant roll about three times before one of us got a passing roll that wasn’t a tie, and Trevor chose to go first. Important note that I wasn’t really paying attention to at the time was that Trevor was looking for a 15 on his WIP roll. This will become important later. I chose side and 2nd deployment, as one does. Since this was Corporate Appropriation, I also chose to defend the prototype on the left (with the blue marker) and destroy the prototype on the right (red marker). I liked the advice offered on this mission by Loss of Lieutenant’s episode on CanCon preparations: it’s more clear to declare which one you’re destroying and which one you’re defending rather than saying which one is “yours.” I think that definitely helped here.
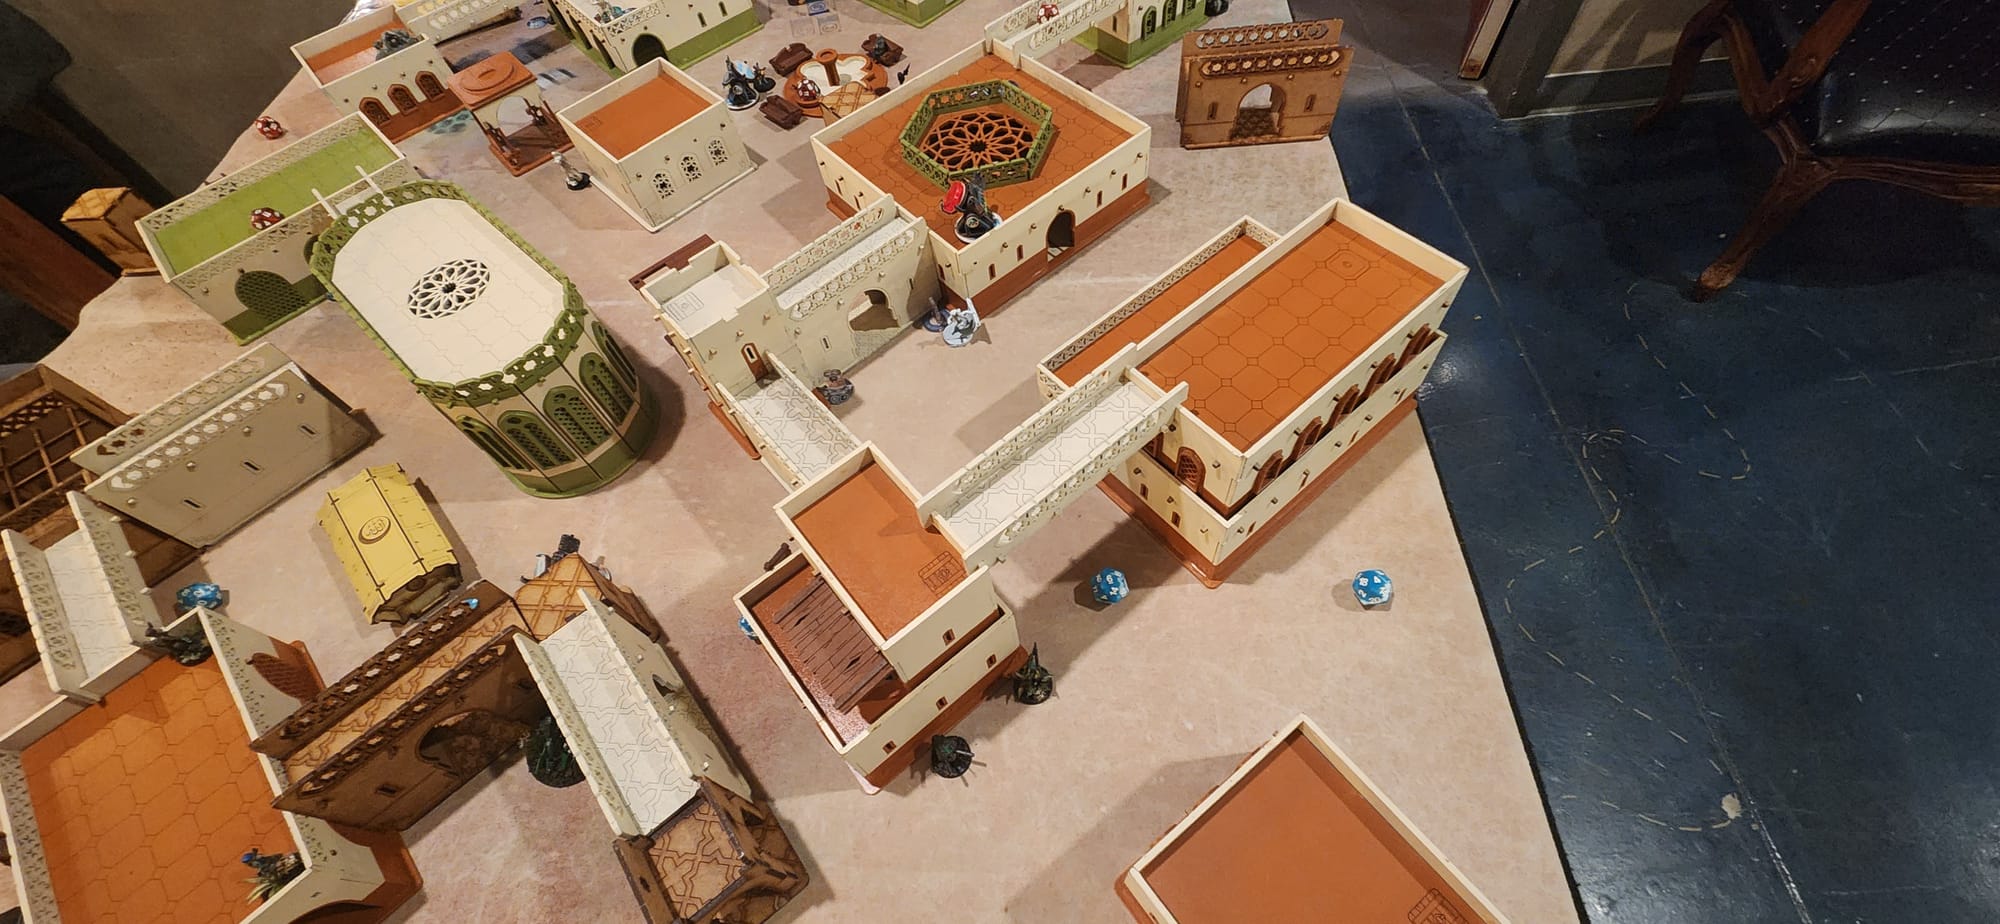
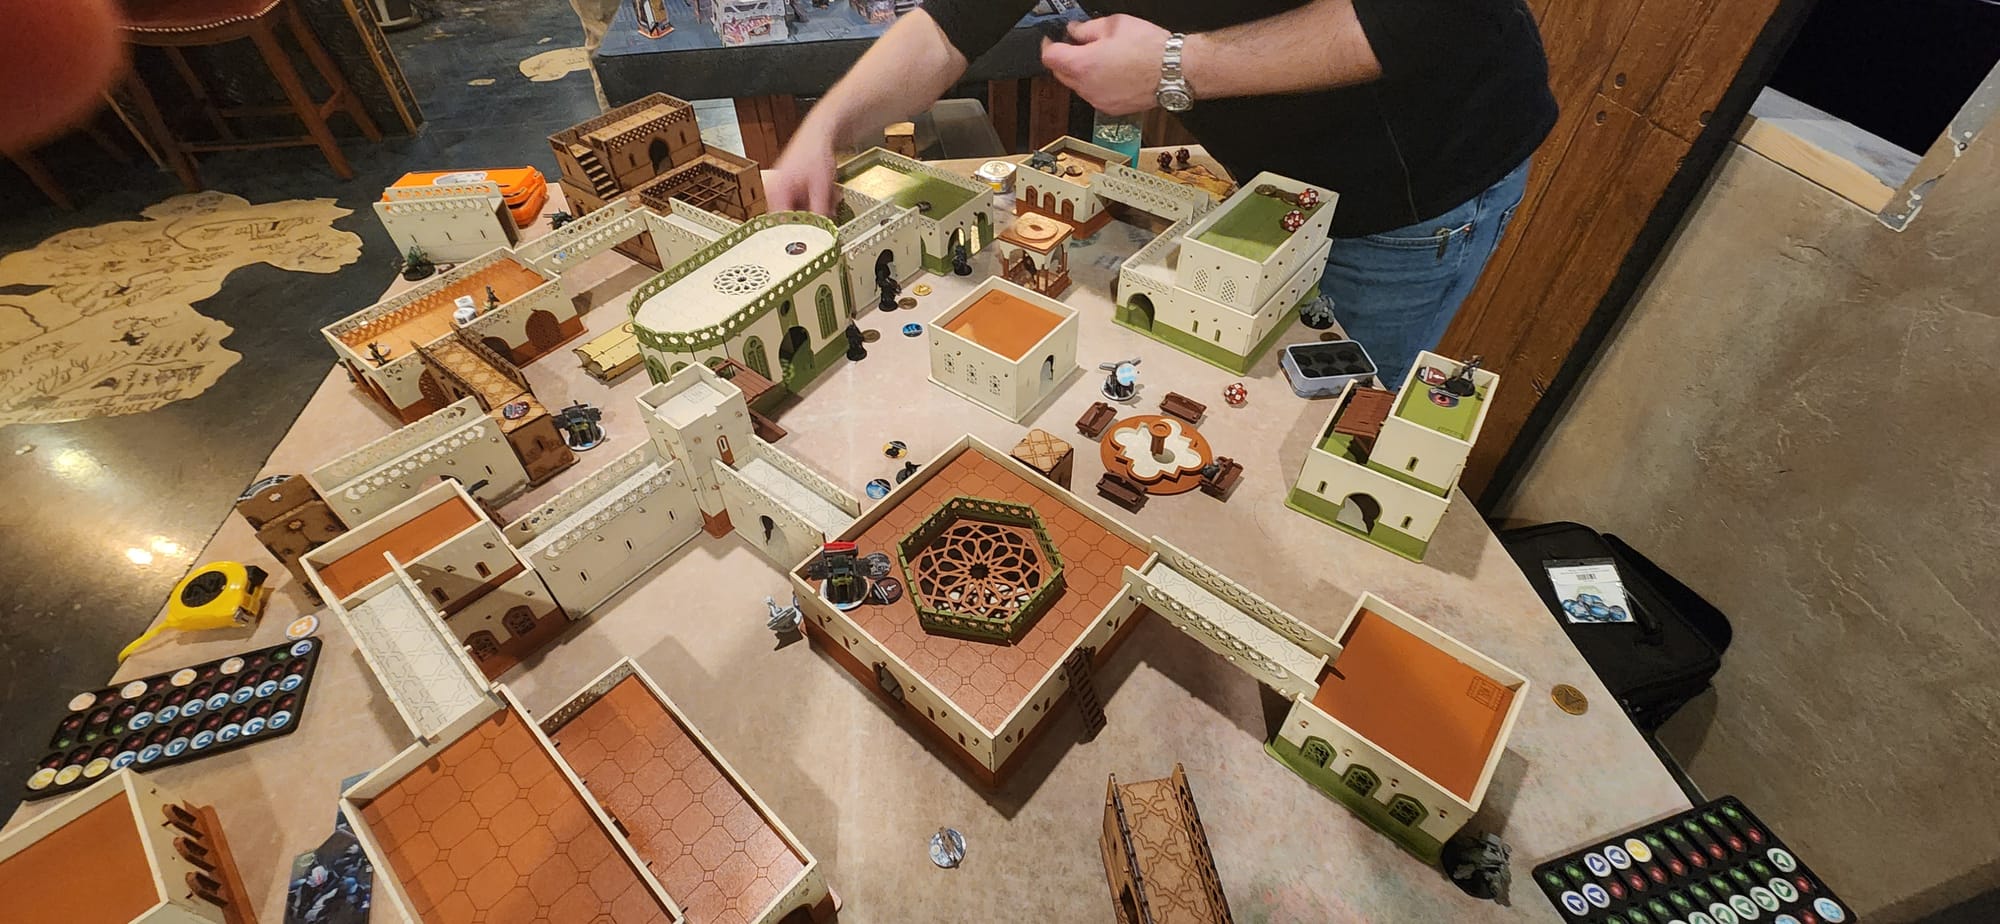
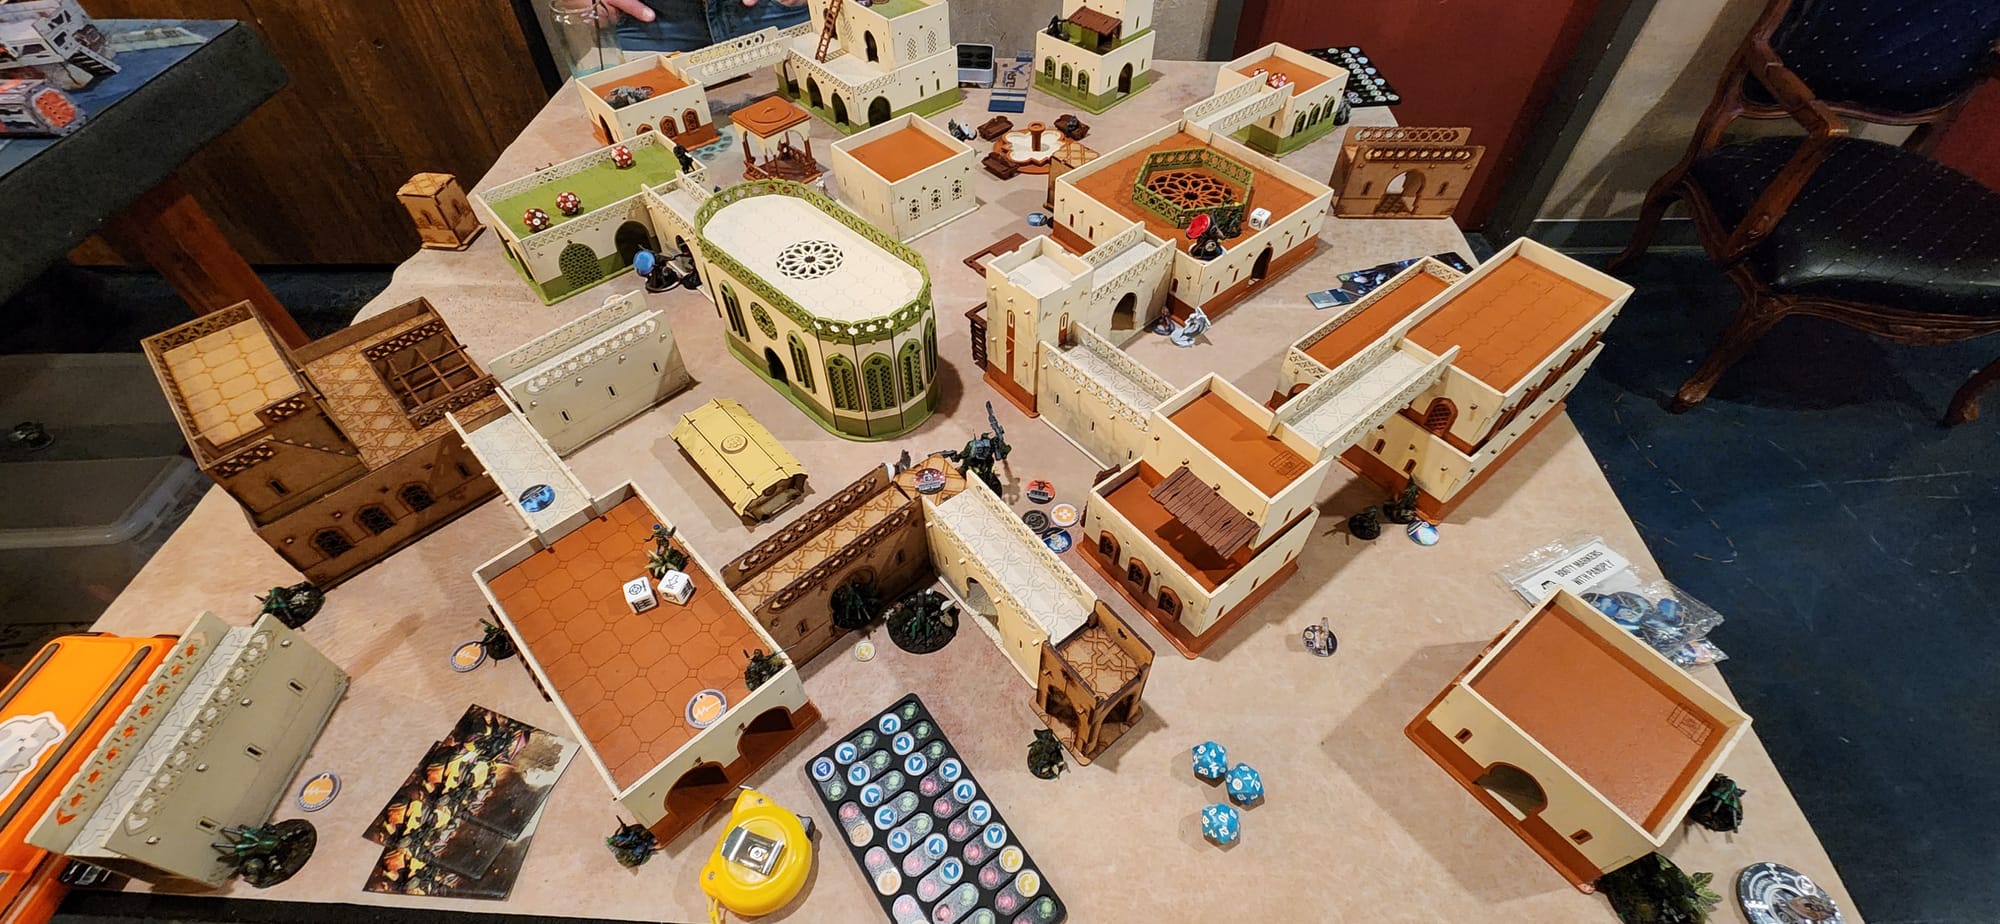
Despite being the owner of the table and the one who set it up, Trevor realized how unfortunate his side was as a DZ with all of the open area as he went to deploy. He set up a Level 4 Hollow Man core with Perseus on my left; a Level 2, 3-person Bounty Hunter link with a Grenzer on and around the two-story, green-roofed building just to the left of the centerline; an Interventor and Warcor on the smaller two-story building to the right of the centerline; a couple flash bots; a Clockmaker… somewhere, with two Forward Observer Puppets in the courtyard near the fountain; a baggage bot on the building near the Hollow Men; and one prone camouflage marker on the large, orange-roofed building near the prototype I was meant to destroy. His HVT went down in front of the Grenzer’s building, near the gazebo. With one model in reserve, he turned deployment over to me.
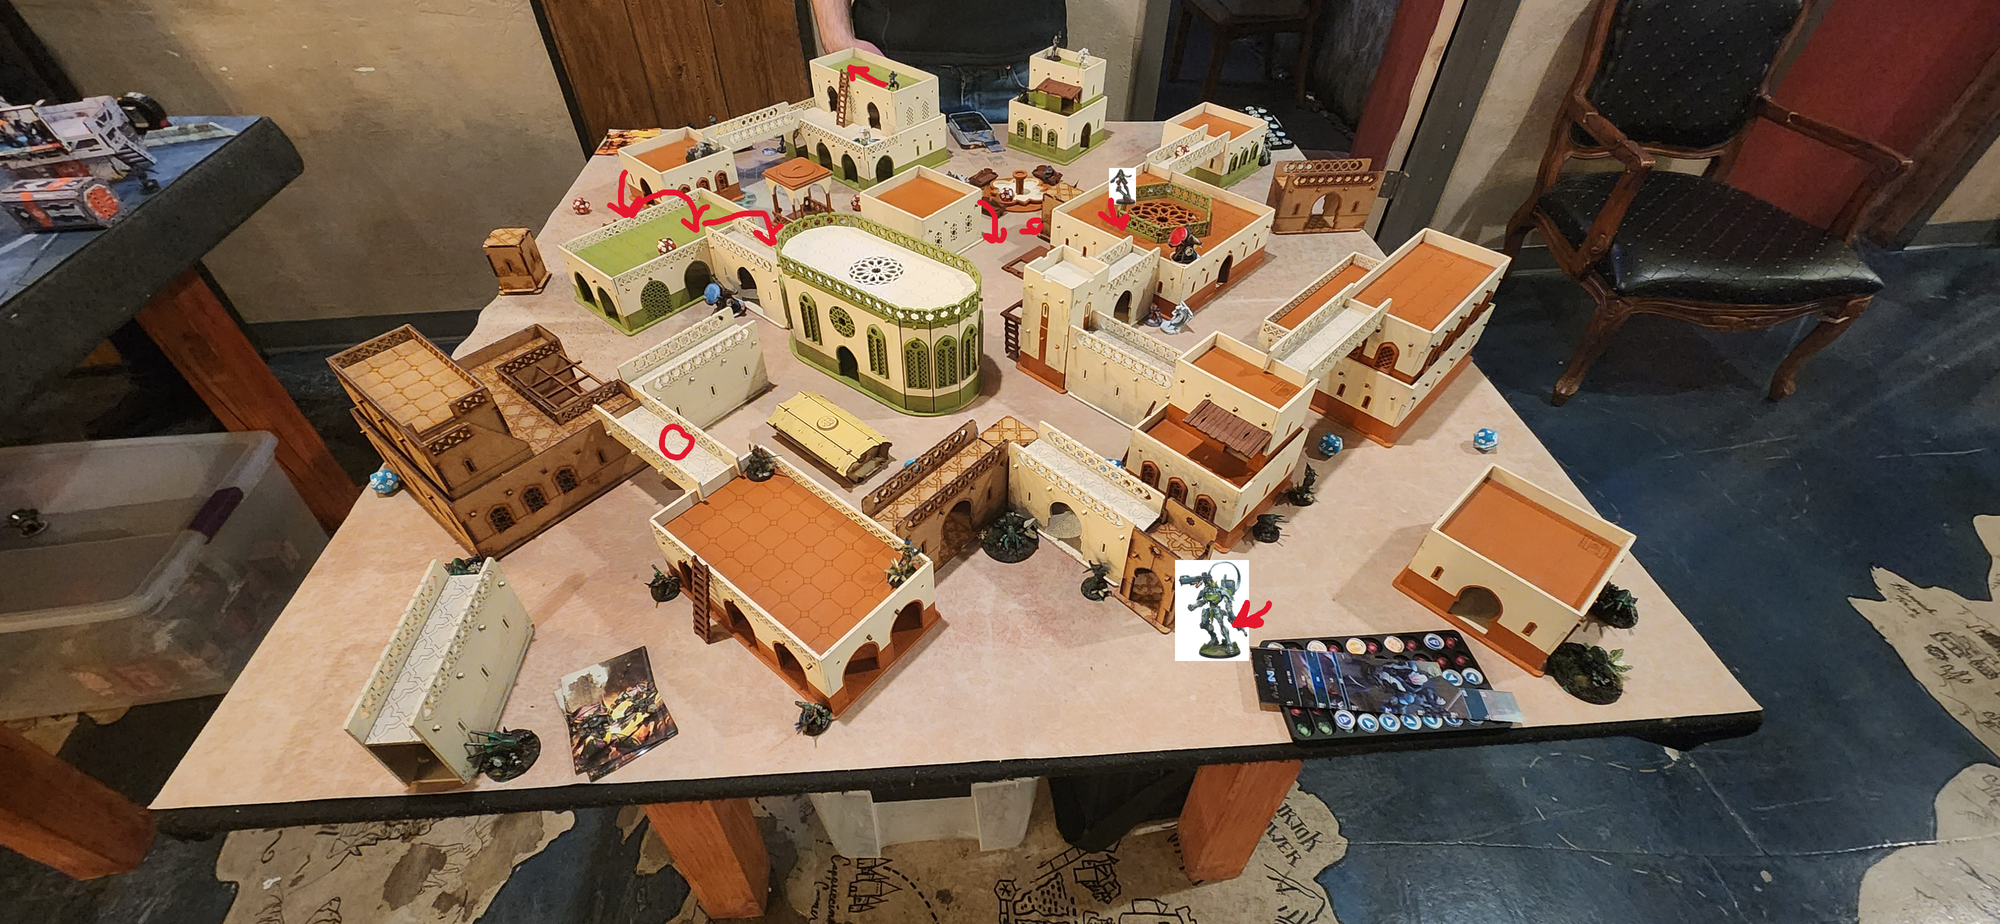
Having lucked into what was indeed a better DZ for me through luck and inertia (classic lazy-gamer), I went to work hiding all my vulnerable pieces. I decided to put my treasure token and HVT below my objective. I think my thought process was that if Trevor wanted to do any HVT classifieds, he would have to come around the corner, which…
Look, I cannot tell you where my head was as the game started. It had only been a week since I had last played, but I forgot to establish fire teams and made EXTREMELY questionable deployment choices. Pretty sure I was operating at MAYBE 30% brainpower.
Anyway, I put the HVT and treasure together so that I would only have to defend one area, and in my defense, putting them under the prototype would mean that my models would be moving up in that direction anyway, hindering any potential Secure HVT/Treasure.
I hid my own 3 flash bots around my DZ to watch for any potential Raoul nonsense, which has gotten me before (and I see now that my fear that he would come in through my DZ was not well founded because he does NOT have Parachutist: DZ. Though the Combat Jump is still a threat). I put my own EVO in the corner of those two arches in the middle, with another baggage bot off in the corner to the right. For reasons, I assume. My Regulars link went on corners of the largest building in my DZ to the left of the centerline, with Scylla on top front corner. A Tech-Bee went in the near forward corner. My Machinist went near my EVO, just about out of template range around the corner from where I had planned to put the Dragao. The camouflaged Beasthunter is tucked away in the corner opposite my HVT and treasure, and Dart is forward-deployed around the corner of the orange-roofed two story building on the right side of the table. The Guarda (proxied with the BSG ORC) and her Auxbot was across the alley, with the Guarda watching the prototype.
I had debated trading the Guarda’s place with the Dragao’s, which may have been better? It would have been a somewhat different game, at least. But Trevor had pointed out that the Guarda has D-Charges, which the rest of the list decidedly lacks. I think the only other model I had with D-Charges for prototype demolition was on the Machinist, which would have been much less capable of getting to the objective. The Beasthunter has a DA CC weapon, as a last resort.
Some may note that my list includes both a Dragao and a Pathfinder Dronbot but I’ve made no mention of deploying the latter. Like I’ve alluded to already, I have no idea where my head was for 90% of this game, and I’ve completely forgotten to deploy it. Trevor is generous enough to let me deploy it in my first turn, and I put it on the other side of the EVO bot. I feel like simply declaring that it’s in a duo with the Dragao at that point is a bit of a stretch of propriety, so it’s hanging out on its own.
Trevor put Mary Problems on the building with the red prototype as his reserve, and I put the Dragao around the corner from the Machinist, with…some view of the blue prototype. I think we both bought speedballs, and I decline to strip orders because I know the Puppet Master has Counterintelligence. Then it was off to the races.
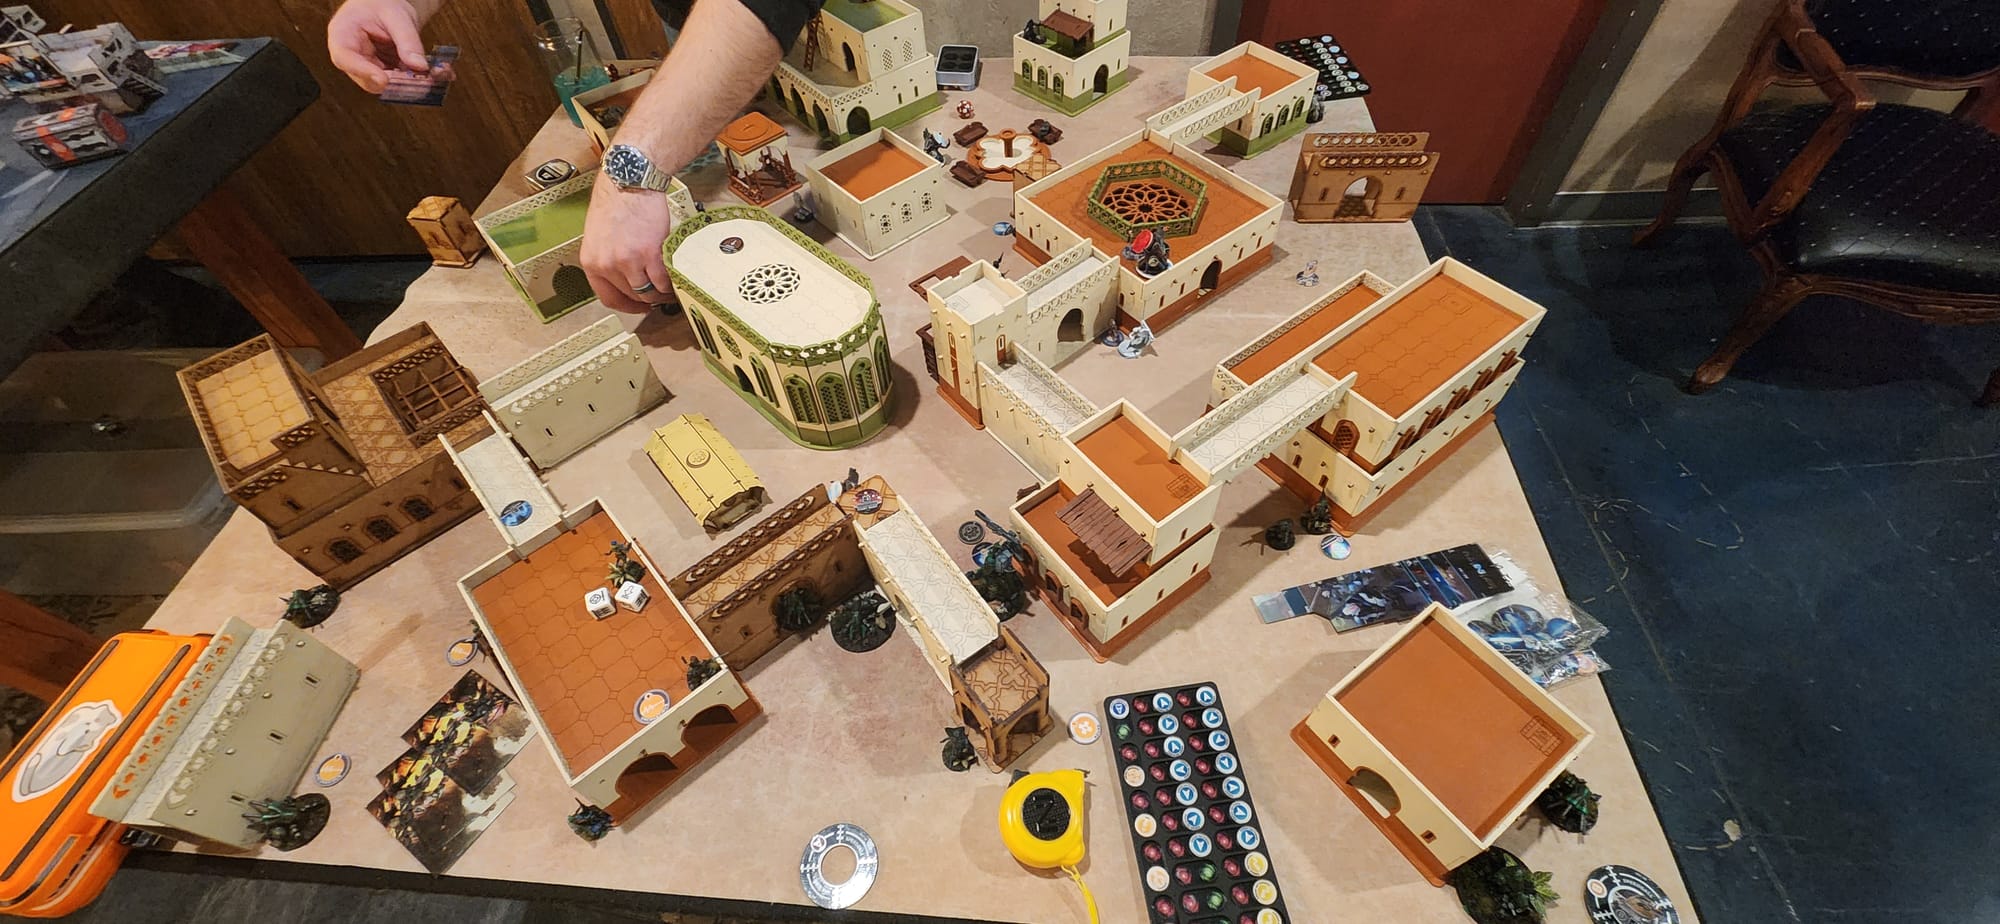
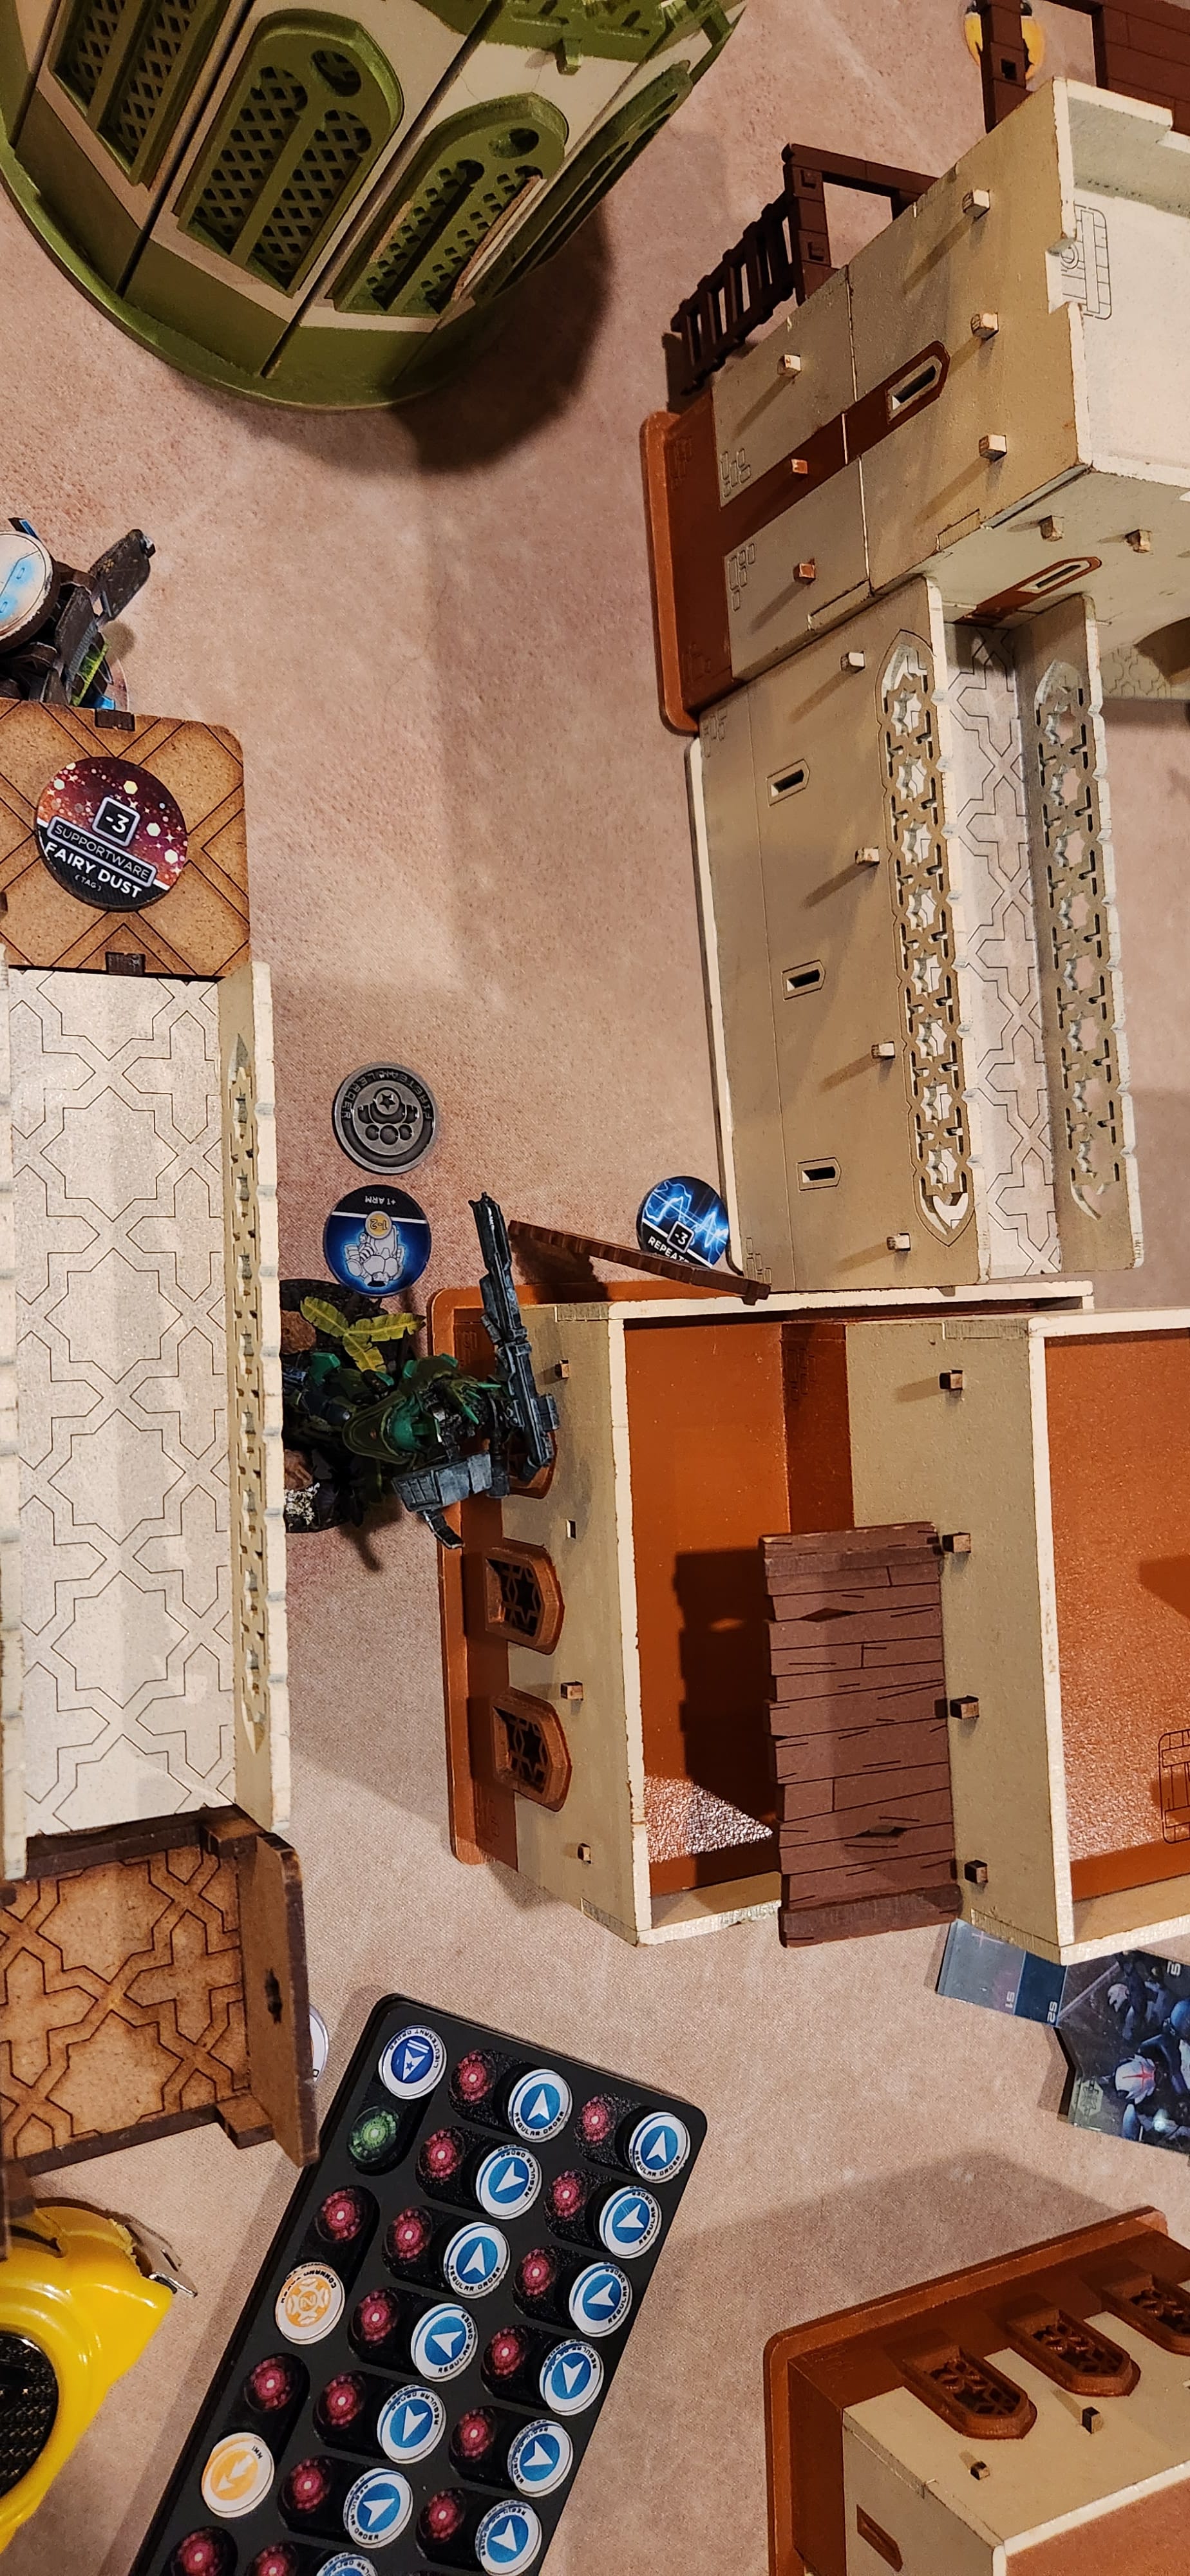
Trevor started his turn checking line of sight from the Grenzer to see if he could see the Dragao, and figured he could move the Grenzer backward along the building’s wall to get line of sight. I declared BS Attack with DA rounds from the HRMC, and the Grenzer shot back. That first face-to-face went poorly for me, which I should have expected given that the Grenzer was 2.5 dice on 16s, while I was 1 on 12. In hindsight, a Dodge (with the Tech-Bee’s bonus bringing it up to 14) likely would’ve been better. The Grenzer got 2 hits, for 4 saves on 16s, which I immediately failed 2 of. With that unfortunate exchange, I chose to fail Guts and break line of sight by moving to the corner of the wall nearest the Machinist.
With my big gun neutralized, Trevor went to work with the Hollow Man core, jumping forward to get near the prototype. Along the way, the Hollow Man pitcher landed a repeater on the bridge near Scylla, and the team nestles in out of line-of-sight on and around the buildings near the blue prototype. With the team safe and the repeater down, Trevor activated Mary and moved forward towards the prototype. I declare some resets around the repeater and Scylla declares Trinity. Mary responds with her own Trinity, leaving the face-to-face as 3 dice on 14s versus 1 die on 13 between the repeater firewall and Scylla’s ECM-3. One of Mary’s AP Trinities gets through, and Scylla promptly fails the save, leaving her unconscious. The Hollow Man spitfire jumps up to engage one of my Regulars and a flash bot and promptly puts both of them down. With the rest of his orders, I think he does some more positioning with the Hollow Men, moves the Puppets forward to be obnoxious AROs after thoroughly looting the panopoly, moves the Grenzer back to its original position while standing up the Bounty Hunters. Then he passes the turn back to me.
I think in hindsight, he could have caused me even more problems had he started moving the red prototype away from me, but I may also be glossing over just how many orders he had already spent to accomplish all of that.
I start my turn by activating the Machinist and moving her to touch the Dragao, and then falling back a little bit to make sure she’s out of danger once the Dragao has at least one wound back and goes to work. No ARO, obviously, so she tries to fix the TAG. And fails. Not too big a deal, it’s a PanOceanian TAG, meaning it has Remote Presence, so I spend a Command Token to re-roll. And fail. The SAA-specific Machinist is pretty neat, and has done great work running and gunning and doing objectives for me before, but they are still, apparently, very WIP 12. I look at Trevor, with the light behind my eyes flickering and in danger of extinguishing, and ask how many command tokens I can spend on a single Engineering roll. He says as many as I have so, figuring that with his experience he would know and too afraid to ask for a second opinion, I spend a second command token (bringing my total remaining to 1) and the Machinist finally makes the roll, bringing the Dragao back to two wounds. This also gets me a Classified point, though I’ve already completely forgotten about Classifieds as a concept, and will only remember late in Round 2 or early Round 3. Fortunately Trevor is a gentleman and a scholar, and I get to count it anyway.
Now definitely afraid to try the Engineering roll again, I decide that whatever happens, happens, and will move the Dragao out to engage to make sure the next part of my plan can proceed safely. It’s about at this point that I notice the missing Pathfinder, deploy it, and spend my last Command Token to link it with the Dragao to get some extra order efficiency with the Pathfinder’s Tac Aware order.
It drops the Bounty Hunter it sees first as it moves back around the corner and forward with its Tactical Awareness Order, and then gets its revenge on the Grenzer with the next order.
Now we need to try to reduce the hacker threat on my active turn. I call down a Vitapack speedball between the Tech-Bee and Scylla, and decide to put the second one near the Guarda, which fortunately turns into a Nanoshield. Both land where I want them to, so it’s up to the Tech-Bee to save us all. She stands and moves towards Scylla. The Warcor declares Flash Pulse, and I realize I may have hecked myself, but I’m committed now, so try to dodge. If I remember correctly, the Warcor fails her roll, the Tech-Bee dodges closer to Scylla and drops prone. In the next order, she crawls over to Scylla’s unconscious body and, with no AROs, brings her back up.
I go to activate Scylla to try to drop some of Trevor’s hackers and as I’m evaluating how I might want to split my burst, something occurs to me.
There’s only one Interventor, and most Tunguska lists will use them as lieutenants, because they’re great at it. I can’t remember what Trevor’s target on the WIP roll was, so I ask and he confirms that he was looking for a 15. I didn’t even really need to ask, since the Interventor was the only eligible lieutenant profile Trevor had on the table, but the 15 WIP confirmed it.
I decide it’s worth losing Scylla if I can put Trevor into Loss. So I allocate all 3 Trinities to the Interventor and will eat Mary’s Trinity, and the Hollow Man’s Carbonite or Oblivion. I think Trevor declared Carbonite from the Hollow Man and Oblivion from the Interventor. I get lucky enough in the first roll, tying the Interventor with a crit and the Hollow Man and Mary failing their rolls. Going again, Scylla lands a Trinity on the Interventor, which puts it unconscious, but taking another wound from Mary’s Trinity. Good enough.
I think I move the Guarda up a bit to get better vantages and start getting closer to actually doing the mission in the next round.
Moving the Dragao forward some more with the last couple of orders in its group, it kills the Warcor, and has some neutral engagements with the Puppets before I run low enough on orders that I have to pull back a bit. My last couple orders in the group are to move Dart out so that I have more options with her in the next round.
I almost pass the turn before I remember that I have an irregular order from the Beasthunter that I can do something with, and she has a DA CC weapon that would be better closer to the objective. And there’s a handy space above the archway leading to the objective building that she could jump to, and that may let me get a flamethrower onto Mary to put her down. So I super-jump the camo marker up there, Trevor declares one discover and two holds.
At this point, I probably should have just moved my 4 inches forward and gone prone as an ARO to keep anyone (like that other camo marker on the roof) from getting frisky, but I decide to use the active turn burst advantage on the flamethrower on Mary. Mary declares dodge, and the other model that saw her jump declares a shot. The Beasthunter dies to the shot, and Mary fails her dodge and dies to the first flamethrower.
So not a bad round 1.
Now in Loss of Lieutenant, Trevor starts his turn by spending some command tokens making regular orders so that he can get some more value out of the Hollow Man team. The pitcher Hollow Man takes two attempts to get out another repeater next to where the Dragao ended its run, while Perseus moves over to the prototype and the Spitfire Hollow Man ends up on the roof behind it. The team is broken when Perseus goes to swing at the prototype and he deals a wound to it.
The camo marker moves forward toward the red prototype and is able to end its movement right next to the objective without issue, since the Guarda was moved to a spot where it couldn’t see much of anything. Other than that, one of the puppets moves a little bit closer and the last Bounty Hunter moves up to try and glue the Dragao with its Akrylat-Kanone. If I remember correctly, the engagement was inconclusive with both of us missing our shots.
Trevor reforms the Hollow Man team, and calls it a turn.
Scylla’s sacrifice has slowed Trevor’s momentum a bit, but now I really need to capitalize on it and get some points back.
So I immediately proceed to make terrible decisions.
With the idea of using the Dragao’s flamethrower to clear the repeater, I move it forward far enough to also get almost to the Panoply and am immediately ARO’d with a Total Control from the Hollow Man hacker and a freshly-reloaded Akrylat-Kanone from the Bounty Hunter.
At this moment, I think I get too committed to keeping the Dragao up and functional. I should have just accepted the Total Control AND the glue gun to get the repeater taken care of. Best case, the two AROs whiff or I make the saves and the repeater is taken care of. Sub-optimal case, the repeater is destroyed, but the TAG is both controlled and glued, and therefore almost neutralized. Worst case, I end up with the repeater making its saves while the Dragao ends up controlled and not glued.
Due to my choice, I get the results of the worst case.
I decide to shoot the Bounty Hunter to try to contest the glue gun and eat the Total Control, while also leaving the repeater undisturbed. Thinking about it now, I should have at least put an HRMC round into the repeater, even if it would have been at bad range. That might have been one of my best options. In any case, I try to put all 5 rounds into the Bounty Hunter. At least one does go through, but the Bounty Hunter makes its saves despite being completely in the open, thanks in part to the +4 armor bomb-disposal suit it rolled for Booty. And then the Hollow Man gains control of the TAG. And the repeater is still there.
Definitely a bad choice leading to a bad result there, especially now that I’m out of Command Tokens due to one instance of bad luck and one instance of stupidity.
But! We can still do the mission to keep the score close. So, using the rest of the orders in the group that are no longer going to go to the Dragao, Dart goes on a mission to clear the way to the objective for the Guarda. She walks onto the wall, copping a Discover from the flash bot, which she ignores to get on top of the building and go prone. The bot does make the discover, but she’s made it to where she needs to go. She is a little exposed to Trevor’s camo marker at the end of her move, and he reveals a Heckler Killer Hacker that drops a Cybermine.
Dart says YOLO and scootches a little closer to the objective and dares the Heckler to do something. He declares BS Attack with his Assault Pistol and the mine goes off. I briefly debate using the SMG, but decide that the SMG might not be sufficiently damaging (looking at the stats again now, this seems INCREDIBLY sketchy), and the Viral effect is worth the drop in burst for the Shock, if nothing else. Regardless of the shakiness of the logic, it works out great. The Heckler takes a hit and is killed by the bow.
I’ll spend the rest of the orders in that group to brick the Puppets that are hanging around the base of the building with Dart’s speculative E/M Grenades, just to make sure they didn’t get up to any mischief in Trevor’s last turn. Everything else on his side is fairly well hidden, and the few Hollow Men that aren’t hidden are not things Dart wants to fight at bad range. I likely should have spent the last order in the group to re-camoflage her instead of bricking the last Puppet, so that she could be a more effective ARO piece from the demonic jack-in-the-boxes that are Hollow Men.
But now it’s time to try to get ahead on the mission. The Machinist moves around the corner slightly to pop out some Vitroferro Deployable Cover as a defense against the no-longer-friendly Dragao. Unfortunately I realize that doesn’t leave me that many orders in group 2 and the Guarda still has quite a distance to cover, though I debate slipping into the archways in the walls to try to take some gunfights (thinking about it now, maybe that would have been the better choice). She moves up to the wall and with the last order, jumps up into contact with the prototype, copping several AROs including one from the Hollow Man Spitfire and Combi Rifle, and taking one wound from the Combi Rifle. She fails guts and goes prone.
Alright, we made it to round 3 in a not-terrible state. Definitely not great, but given all the brain-dead decisions I’ve made so far, not too bad.
Trevor’s first actions are to finish off his prototype with Perseus. I think it still took two orders to do (those prototypes are pretty tough). Then there’s some demonic jack-in-the-box activity from the Hollow Men, particularly the Spitfire, that puts down Dart and kills the Guarda in one order by splitting fire. I realize now that I 100% goofed and either had the Guarda’s Auxbot go prone, or didn’t consider ARO’ing with it, which might’ve helped with the Eclipse launcher.
At this point the game is pretty much over. Trevor splits the Hollow Man team once he gets Perseus into contact with the red prototype so that the Spitfire is on the tower overlooking the Dragao and the panoply.
With that, it’s my last chance to make something happen. The last model I have that can innately deal with the prototype is the Machinist with her D-charges. Unfortunately, she hasn’t really moved since round 2. And her order pool is even more anemic. And there’s that damned Hollow Man looking over the space she’s going to have to move her one-wound, one-armor butt through.
Trevor humors me as I start by using the Pathfinder’s TacAware order to engage the Hollow Man on the tower. I actually win the gunfight, but the remote’s Combi Rifle is too weak to punch through both the cover and the armor. I try again, with about the same result.
Then I think of something funny to try and figure, why not? The Tech-Bee has been hiding since her heroic moment enabling Scylla’s sacrifice. I stand her up to see the Hollow Man, who is obviously going to shoot at her. I declare BS Attack with the Adhesive Launcher Rifle. If I remember correctly, the Tech-Bee fails the face-to-face but survives the shot. I try it again, with the same results, and then decide the higher burst on the Combi Rifle is more likely to neutralize the Hollow Man (which… maybe? It didn’t really matter at this point). The end result is that the entire group’s orders are spent for no discernible change in the state of the board.
I move the Machinist out into the open, and when the Hollow Man starts shooting, I debate for a little while about shooting back before realizing that I don’t have any orders to spare if I want to try to get to the prototype. So I move again with my second skill. The Machinist survives the shot and in the next order moves to the corner of the building. At this point, I know that I don’t have the orders to get close enough to the building to jump up AND place the D-charges, especially with Perseus guarding it. I take a gunfight with Perseus for the second skill and probably lose and fall to the Breaker Combi.
And that’s where we end the game. Tunguska takes it, 9-1, having completed all three Classifieds in Trevor’s second and third round. Funnily enough, he and I had almost identical Classifieds; we both shared (I think) Data Scan and Nanoespionage, and then my third was Combat Support.
Despite getting quite a few games in against Tunguska lately, I completely neglected their capabilities when I was deploying. The mad hops they have give them so many more angles of attack that you have to consider when setting your defenses in deployment and at the end of each of your turns. Given the locations of the prototypes, I likely also should have chosen the other prototype to destroy since it would've been easier for me to get to.
This list may not be the most optimal when facing Tunguska or another Nomad or hacking-heavy faction. Scylla has to support a lot of weight in the infowar for how fragile she is, even with BTS 6. I think I may have deployed her a little too far forward in this game, and definitely put that whole team in a dangerous position facing Hollow Men. I likely should have swapped that team’s location with the baggage and flash bots in the right-hand corner. Trevor likely could have still gotten to the prototype, but I would’ve been in better shape to hit back.
I also wonder if I would’ve benefitted from swapping the Guarda and the Dragao. I might’ve lost the easy path for the Guarda’s D-Charges, but having both the Guarda and the Auxbot pull things from the panoply simultaneously could’ve been a neat way to catch up in that race.
Otherwise, I think one of the major inflections was not getting rid of the second repeater when I had the chance. Even if I had lost the Dragao, killing the repeater would have freed up some breathing room. One of the reasons the Guarda didn’t make it to the panoply in time to do anything about it was that it had to make a couple of resets as it cleared that repeater’s Zone of Control.
I think the list could have legs, and maybe it just needs a more open table setup to truly shine. We’ll keep trying it as-is a few more times before we make any more changes.
All in all, it was a good game that led to some great material for this kind of exercise. Trevor is always lovely to play against, and is a very generous opponent, even as he’s using his vast experience to shatter your army.
I think that’ll be enough for this week. Until next time!